
With our archives now 3,500+ articles deep, we’ve determined to republish a traditional piece every Sunday to assist our newer readers uncover a few of the finest, evergreen gems from the previous. This text was initially printed in February 2018.
You’re staying in a cabin with some family and friends within the distant wilderness removed from civilization. It’s quiet. Pristine. Life is nice.
One morning whereas your buddy is splitting wooden, his maul glances off the log and cuts into his leg, leaving a big gash. Whereas the wound is giant and deep, the maul didn’t hit an artery or giant vein, so there isn’t a threat of him bleeding out. You get him again to the cabin to take a better look and clear it out.
Whereas the bleeding has stopped, there’s nonetheless an enormous, gaping wound in your buddy’s leg. It must be closed as much as cut back the prospect of an infection and so the wound can begin therapeutic correctly. You attempt a butterfly bandage, nevertheless it’s not retaining the wound collectively. It’s clear your buddy wants stitches, however the nearest physician is a day’s journey away. Fortunately, you may have a suturing equipment in your first assist provides, and you know the way to stitch him up your self.
What Is Suturing?
Suturing is a elaborate approach of claiming stitches. It’s once you use a sterilized needle and thread to stitch collectively a extreme wound in order that tissue can begin therapeutic correctly in addition to to cut back the possibilities of an infection.
Sutures are used when a wound is deep and gaping. For instance, for those who can see fats in your wound, you must get stitches. When you simply tried to shut the wound with a bandage, it could solely carry the highest a part of the tissue collectively, leaving the tissue beneath nonetheless separated. That little hole can develop into a breeding floor for an infection. Suturing ensures that you simply carry all of the layers of tissue collectively so the broken wound can begin therapeutic.
One other instance of once you may must suture: A buddy of mine has a cousin who was concerned in an accident that left a finger indifferent from his hand. They had been in a distant space and couldn’t get to an emergency room straight away. So the dad (who was a vet) used a suturing equipment to stitch it again on. It wasn’t excellent, nevertheless it stored the indifferent finger tissue from dying they usually had been in a position to get him to the emergency room to have it correctly sutured. My buddy’s cousin nonetheless has that finger.
DIY Suturing Ought to Solely Be Completed in Actual Emergencies
Suturing is a talent that takes a substantial quantity of observe. When you do it incorrectly, at worst you may trigger a life-threatening an infection or the wound to heal improperly; at finest, you’ll go away a horrible wanting scar on the individual. When docs carry out suturing, they usually inject a numbing agent into the realm they’ll be stitching up so the affected person can’t really feel a needle going out and in of his flesh. You in all probability gained’t have that on you, so suturing will probably be very painful. One more reason it must be a final resort.
For these causes, suturing ought to solely be utilized in emergency conditions once you gained’t be capable of get to a health care provider inside 12-24 hours. Usually, for those who’ve acquired a gaping wound, do what you may to cease the bleeding and use butterfly bandages and gauze to shut it up as a lot as doable. Then name 911 or get your self to an emergency room ASAP.
If for some motive you end up in a state of affairs that stops you from attending to a health care provider, right here’s the right way to do it your self.
Suturing Provides
In an excessive pinch, you can in all probability use an everyday previous needle and thread (ideally sterilized with boiling water or in any other case) to suture a wound. However that will 1) be exhausting, and a pair of) enhance the prospect of an infection.
To correctly and successfully suture a wound, you’ll wish to come up with a suturing equipment. Right here’s what you’ll want at a minimal:
- Needle driver. That is what you’ll use to carry the needle once you’re placing it via the tissue.
- Tissue forceps. You’ll use these to control the tissue across the wound whilst you apply the suture.
- Scissors. To chop extra thread.
- Sterilized needle and thread. While you apply sutures to somebody, you’re placing in and leaving international objects of their physique. You wish to make certain they’re sterilized. You should buy sterilized suture threads at most on-line first assist and survival shops. The needle on a medical suture is often curved to make stitching a bit simpler.
Make sure every part is sterilized earlier than utilizing on human flesh. Kits generally include sterilizing alcohol wipes; if yours doesn’t, you should definitely add some.
How you can Follow Suturing
You don’t need your first time suturing to be once you’re confronted with an precise gaping, bleeding wound. You’ll wish to observe. However how do you observe suturing a wound with no wound?
There are just a few methods:
Pig stomach. I realized the right way to suture on a flap of pig stomach. Whereas the pig stomach had all of the tissue that you simply’d see on a human, together with pores and skin, fats, and a little bit of muscle, pigskin is far thicker than human pores and skin. When you’re not cautious, you’ll find yourself bending your suture needle attempting to get it via the pig’s armor-like dermis.
To create your observe wounds on the pig stomach, simply reduce it with a knife or scalpel.
Rooster with pores and skin. I’ve heard {that a} rooster breast with the pores and skin on makes for good suturing observe because the pores and skin is a little more like human pores and skin.
Banana. Bananas have a pleasant fleshy texture that makes for good suturing observe.
Suture pad. When you don’t wish to observe suturing in your meals, you should purchase a suturing observe pad. They’re constituted of latex and have precut wounds on them. One of many advantages of suture pads is that you need to use them a number of occasions, not like the pig stomach or rooster that will must be thrown out after you’ve practiced on (after which maybe eaten) them. Suture pads are reasonably priced; you should purchase one on Amazon for $10. I’m utilizing a suture pad within the instance under.
How you can Suture a Wound
There are completely different suturing methods with various levels of issue. Extra advanced suture methods are used to cut back scarring.
For this text, we’ll exhibit the right way to carry out probably the most easy suturing approach: interrupted (or intermittent) sutures.
An interrupted suture is known as that as a result of every sew isn’t related. You make one, tie it off, after which make one other.
Interrupted sutures are easy to position and safe. In addition they help you make adjustments rather more simply than a steady suture. Simply reduce one of many stitches, modify the wound, after which suture once more.
Right here’s the right way to do interrupted sutures:
1. Wash arms and put together the wound. Wash your grubby arms like a health care provider to cut back the possibilities of infecting the wound. Put together the wound for suturing by cleansing out any particles with water. Clear out as a lot blood as doable. Placed on latex gloves.
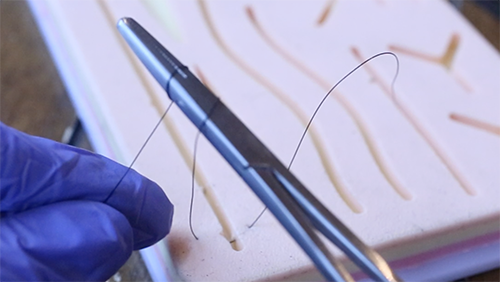
2. Use your needle driver to seize the needle. Ensure the needle clamp locks in place. Pull all of the thread out of the suture equipment.
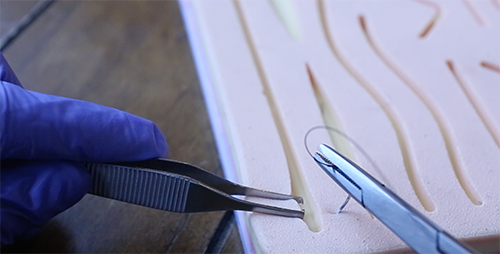
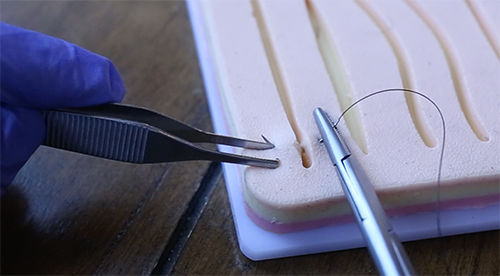
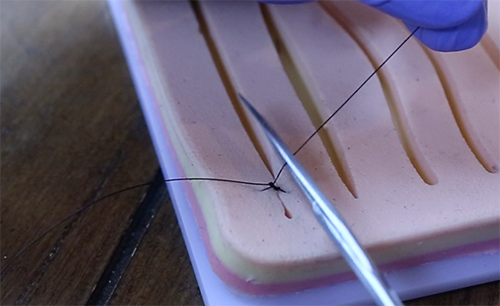
3. Use the tissue forceps to show the facet of the wound you’ll start the suture on. This allows you to see what you’re working with and the way deep the wound goes. Line up the perimeters of the wound as a lot as you may.
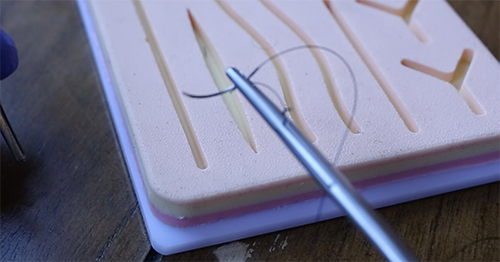
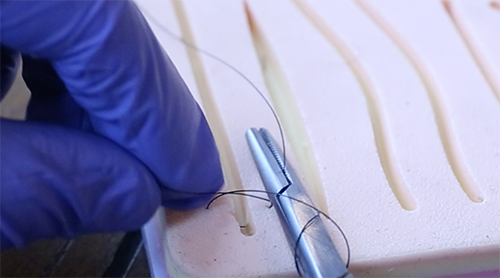
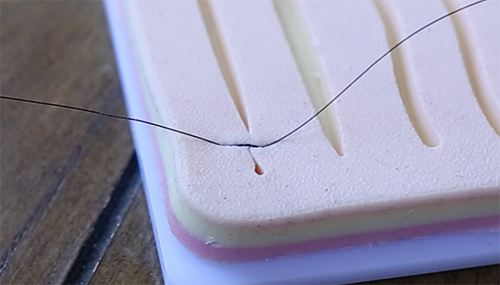
4. Push the needle via the pores and skin at a 90-degree angle a few centimeter to the proper of the wound. Don’t go under the fats. Good above it.
5. While you’ve gone deep sufficient, twist your hand clockwise in order that the needle begins developing on the opposite facet of the wound. You need the needle to come back out straight throughout from the primary needle gap.
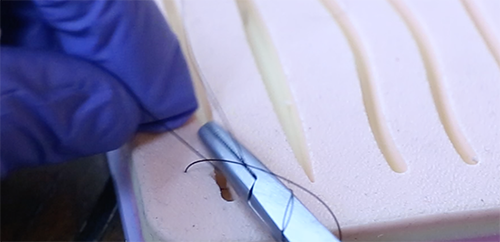
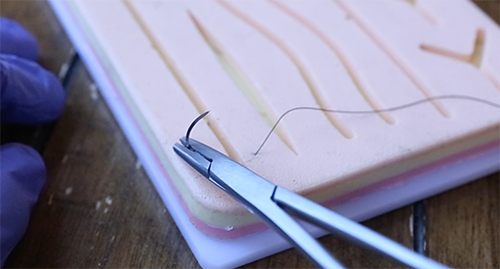 6. When the needle has come out on the opposite facet of the wound, unlock the needle driver, reattach it close to the tip of the needle (you don’t must lock it), and pull till you may have about 1-2 inches of thread left on the proper facet of the wound. Launch the needle.
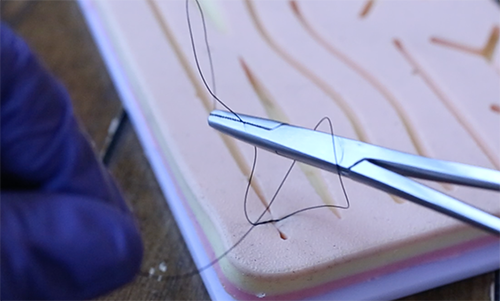
7. Utilizing your left hand, maintain the thread on the left facet of the needle and wrap twice across the tip of the needle holder.
8. Barely open the needle holder and seize that 1-2″ of thread on the proper facet of the wound.
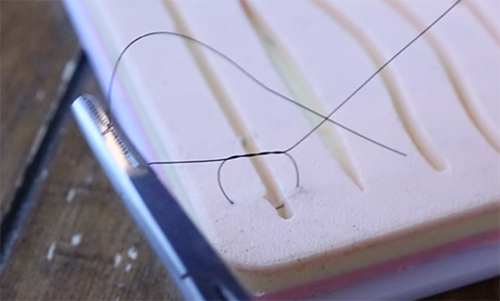
9. Utilizing your left hand, pull the lengthy a part of the thread. The a part of the thread wrapped across the needle holder will slide off. You’ll have created a easy overhand knot with two loops. That is referred to as the “first throw.”
10. Tighten issues in order that the tissue is simply touching and ensure the knot is mendacity flat.

11. Time for the “second throw.” Utilizing your left hand, maintain the lengthy finish of the thread and wrap it as soon as across the needle driver clockwise. Barely open the needle driver and seize the brief finish of the thread. Utilizing your left hand, pull the lengthy a part of the thread. You’ll end off your surgeon’s knot with one other overhand knot.
12. Repeat step 11 another time for a “third throw” to actually create a safe knot. As an alternative of wrapping the thread clockwise across the needle driver, wrap it counter-clockwise. This may stop the knot from slipping.
13. Reduce the surplus thread.
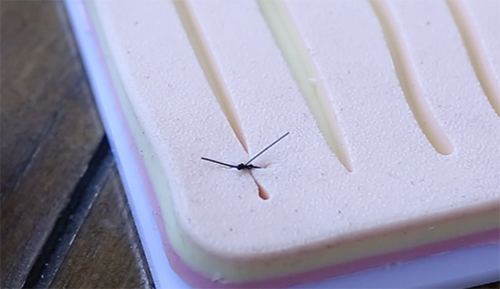
14. Transfer a quarter-inch down the wound and repeat the method.
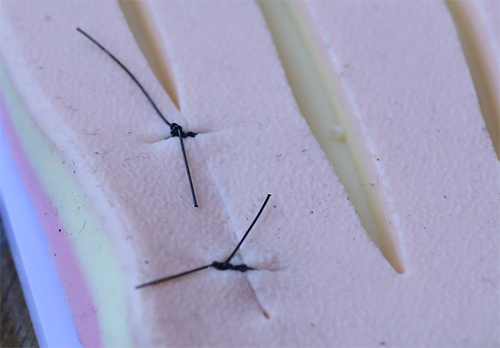
15. Ensure all of the knots are lined up on the identical facet. Mine are on the left facet of the wound.
16. Wrap your sutured wound with a sterilized bandage. Get skilled medical consideration as quickly as doable.